You step up to warm up for a workout, drop into a bodyweight squat, and hit a sudden wall. Your heels want to rise off the floor. Your hips feel pinched, or your lower back rounds before your thighs reach parallel. You might wonder if your joints have simply worn down, or if deep squats are something you should leave in the past.
Squatting is a fundamental pattern for getting out of deep chairs, picking up heavy objects, and staying active in sports. Limited depth after 45 is rarely an unavoidable permanent condition. It is usually an issue of matching your anatomy, joint range, motor control, and strength to the right movement variation.
This guide lays out a clear system to restore a comfortable, capable squat. You will learn what the research actually says about joint movement, how to find your personal restrictions, and how to build lasting strength through a full range of motion.
What the research shows about squat depth and mobility
Squat mobility is not just about stretching a tight muscle. It is the ability to coordinate and control the ankle, knee, hip, pelvis, and trunk under load.
Research examining deep squats shows that reaching full depth demands significant movement across several joints at once. In biomechanical testing of deep squatting, average ankle dorsiflexion reached roughly 23.4 to 25.9 degrees. At the same time, average knee and hip flexion both measured around 124 degrees. Ankle dorsiflexion range directly predicted how much the ankle bent during the squat, while also influencing how far the hips could flex.
Joint requirements also differ between men and women. In one study analyzing lower-body movement, ankle dorsiflexion with a bent knee and overall hip-flexion range accounted for 43.5 percent of the variance in squat depth for men. For women, ankle dorsiflexion with a straight knee and dorsiflexor strength accounted for 32.4 percent of the variance.
These findings show that squat depth is a whole-body equation. When one joint cannot access its required range, the body alters movement somewhere else. A restriction at the ankle often forces the hips to flex further or causes the torso to pitch forward.
Research also demonstrates how different squat variations shift work across your joints. In studies comparing standard bodyweight squats to counterbalanced squats in older adults, holding a small weight out in front increased hip flexion angles and required more work from the hip extensors. Standard squats placed greater demands on knee flexion, ankle dorsiflexion, and the calf musculature.
Changing your stance, your footwear, or where you hold a load alters the mechanical demand on every joint. There is no single universal joint angle that defines good movement for every lifter.
For more foundational concepts on joint health, explore our mobility, joints, and functional movement resources.
Why squat mechanics change after 45
Movement patterns evolve over time. These changes are a normal response to training history, daily habits, and tissue adaptation rather than an inevitable decay.
Connective tissues, including tendons and joint capsules, naturally lose some water content and resting compliance over the decades. The Achilles tendon and the hip capsule become stiffer if they are not regularly moved through their outer limits. This change reduces passive flexibility, which makes joint positions feel tighter during the descent of a squat.
Daily movement habits also shape joint capacity. Decades of desk work, long commutes, and wearing shoes with elevated heels keep the ankles and hips in shortened positions. Over time, the nervous system stops recognizing deep flexion as a safe, stable position. It restricts your range to protect you from positions where you lack strength.
Joint morphology plays a major role as well. The shape of the hip socket and the angle of the femoral neck vary widely from person to person. As men age, minor joint remodeling, previous sporting injuries, or mild cartilage changes can make certain hip angles uncomfortable. Forcing a narrow, toes-forward stance when your hip anatomy favors a wider stance creates joint impingement rather than a productive stretch.
Muscle mass and rate of force development also decline if they are not deliberately maintained. When the quadriceps, glutes, or calf muscles lose strength, the body becomes hesitant to sink into deep ranges. The brain recognizes that rising back up might be difficult, so it stops the descent early.
Aging does not mean your joints are broken. It means your tissues require smarter preparation, clear movement signals, and progressive strength training to stay supple and strong.
What limited mobility means in real life
A restriction in the gym rarely stays in the gym. Losing the ability to squat comfortably changes how you navigate daily physical tasks.
Squatting is the mechanical foundation of standing up from low surfaces, working in the garden, loading gear into a vehicle, and navigating steep trails. When squat depth is restricted, simple actions require awkward compensations. You might push heavily off your knees with your hands or round your lower spine to reach the ground.
In the gym, poor squat mobility limits your training options. If your ankles do not bend, your heels lift, shifting excessive pressure onto the front of your knees. If your hips pinch, you might round your lumbar spine under a barbell, which irritates the lower back.
Many lifters respond to these problems by avoiding squats altogether. This avoidance leads to a cycle where the joints receive even less stimulus, becoming stiffer and weaker over time.
You do not need to drop into a competition-depth Olympic squat to maintain excellent physical capability. You need enough usable, pain-free range to move with confidence, carry loads, and protect your joints during work and recreation.
To understand how to keep your body resilient over time, review our guide to healthy aging strategies for active men.
How to assess your personal movement limiters
Before starting any mobility routine, you must find where your movement is actually restricted. Blindly stretching your calves or hips without testing will waste time and effort.
Run through these five simple baseline checks. Perform them barefoot on a stable surface without warming up aggressively.
1. The baseline bodyweight squat check
Stand with your feet shoulder-width apart and your toes turned out slightly. Place your hands in front of your chest and descend as low as you comfortably can.
Observe what stops your movement:
- Do your heels lift off the floor as you descend?
- Does your chest fall forward excessively?
- Do your hips pinch or feel blocked near the bottom?
- Do your knees ache or feel unstable?
- Do you feel like you are going to fall backward?
Write down your primary limitation.
2. The heel elevation comparison
Repeat the bodyweight squat, but place a 5-pound weight plate or a one-inch wooden wedge under your heels. Descend again.
If your depth improves immediately and your torso stays upright, limited ankle dorsiflexion is a primary contributor to your restriction. Elevating the heels artificially creates forward tilt in the lower leg without requiring extra ankle motion. If your squat depth and comfort do not change, your primary limitation is likely at the hips, pelvis, or trunk.
3. The knee-to-wall ankle test
Face a wall barefoot. Place your big toe about four inches away from the wall.
Keep your heel flat on the floor and drive your knee directly over your middle toes toward the wall. Touch your knee to the wall without letting your heel lift or your foot collapse inward.
Test both sides:
- If your knee easily touches the wall while your heel stays flat, your ankle dorsiflexion is adequate.
- If your knee cannot touch the wall, slide your foot closer until it can, and measure that distance.
- Note if one ankle is significantly tighter than the other.
Pay attention to where you feel the stop. A stretch in the calf or Achilles tendon points toward muscular stiffness. A pinching sensation in the front of the ankle indicates a joint restriction.
4. The hip quadruped rock-back test
Get onto your hands and knees on a comfortable mat. Set your knees at your standard squat width with your feet pointed slightly outward.
Keeping your spine neutral, slowly push your hips back toward your heels. Notice how far your hips travel before your lower back starts to round:
- If your hips move close to your heels without your back rounding, your hips have plenty of passive flexion. Your squat restriction is likely due to balance, ankle mobility, or standing motor control.
- If your pelvis tucks or your hips pinch early, your hip anatomy requires a different stance width or foot angle.
Adjust your knee width wider or narrower and repeat the test. Find the knee width that lets your hips travel deepest without pinching or rounding your spine. This is your body's natural squat stance.
5. The counterbalance balance test
Stand in your normal stance and hold a 10-pound plate or light dumbbell straight out in front of your chest. Descend into a squat.
If holding the weight allows you to squat noticeably deeper with a stable torso, your main issue is balance and center-of-mass management rather than a true joint restriction. The weight in front acts as a counterbalance, allowing your hips to sink between your feet without the fear of tipping over.
Step-by-step system to rebuild squat mobility
Once you know where your limitations lie, use this structured system to rebuild comfortable depth. This approach combines joint mobilization, active control, and progressive strength loading.
Phase 1: Freeing up the ankle joint
If your ankles restricted your test, prioritize these two movements during your warm-ups.
Supported ankle rocks with kettlebell load
Kneel on one knee with your front foot flat on the floor. Place a moderately heavy kettlebell or dumbbell across the top of your front knee.
Keep your heel pressed firmly into the floor. Drive your knee forward over your middle toes until you reach the end of your comfortable range. Hold the position for 3 seconds, then return to the start.
Perform 2 sets of 10 controlled repetitions per side. The added weight helps mobilize the joint capsule and lengthens the deep soleus muscle.
Bent-knee soleus raises
Stand on the edge of a step with your balls of your feet supported and heels hanging off. Bend both knees slightly to roughly 20 degrees.
Maintain this knee bend throughout the movement. Slowly lower your heels below the step over a 3-second count, hold the bottom stretch for 2 seconds, then press up onto your toes.
Perform 3 sets of 12 to 15 slow repetitions. Training the calf with a bent knee isolates the soleus and builds strength at the deep end of ankle flexion.
Phase 2: Optimizing hip mechanics and stance
Your hip joints need both flexion and rotational freedom to allow your pelvis to settle between your thighs.
Quadruped hip rock-backs with rotation
Set up on your hands and knees using the comfortable stance width you found during your self-assessment. Turn your feet slightly outward.
Slowly push your hips backward toward your heels while keeping your spine neutral. When you reach your comfortable end range, gently shift your weight slightly toward your left hip, hold for 2 seconds, then shift toward your right hip for 2 seconds.
Return to the starting position. Perform 2 sets of 8 smooth rock-backs before your squat sessions.
Active 90-90 hip transitions
Sit on the floor with both knees bent at 90-degree angles, one leg in front and one leg out to the side. Sit tall without slumping through your lower back.
Keeping your heels planted on the floor, slowly lift your knees and rotate your legs across to the opposite side. Control the movement using your hip musculature rather than throwing your body weight.
Perform 2 sets of 6 slow rotations per side. This movement restores internal and external rotation, which are needed for smooth squatting.
Phase 3: Mastering trunk control and balance
If you struggle to stay upright or feel off-balance, you must teach your trunk and pelvis to coordinate properly during the descent.
Counterbalanced goblet box squats
Hold a 10-to-15-pound kettlebell or dumbbell against your chest. Stand in front of a box, bench, or sturdy chair set just below knee height.
Set your stance to your preferred width. Push your hips back and bend your knees, controlling your descent over 3 seconds until you sit lightly on the box. Keep your chest up and your feet flat.
Pause on the box for 1 second without relaxing your core, then drive through your whole foot to stand up.
Perform 3 sets of 8 to 10 repetitions. The box removes the fear of falling, while the front load keeps your torso organized.
Doorframe-supported deep squat holds
Stand facing a sturdy doorframe or squat rack upright. Hold onto the frame with both hands at chest height.
Use your arms for light support as you lower yourself into the deepest squat position you can comfortably manage. Keep your heels flat on the floor and your chest tall.
Once in the bottom position, take 5 slow, deep breaths in through your nose and out through your mouth. Allow your pelvic floor and hips to relax into the position while maintaining foot contact. Use your arms to assist you back to standing.
Perform 3 sets of 30-second holds. This drill teaches your nervous system that the bottom of a squat is a safe, stable environment.
Strength is part of mobility
Stretching alone will not create lasting improvements in your movement. A joint will only keep the range of motion that your nervous system knows how to stabilize and control under load.
A review of stretch training research shows that regular stretching for at least two weeks can increase joint range of motion. However, passive flexibility does not automatically transfer into a strong, stable squat. You must build strength at the outer edges of your movement.
Strength training is a primary requirement for maintaining physical independence and vitality. The World Health Organization recommends that adults perform muscle-strengthening activities involving all major muscle groups on at least two days per week. For older adults, guidelines emphasize varied physical activity that focuses on functional balance and strength training on three or more days per week to enhance functional capacity and prevent falls.
Incorporate these strength-focused mobility exercises into your weekly routine:
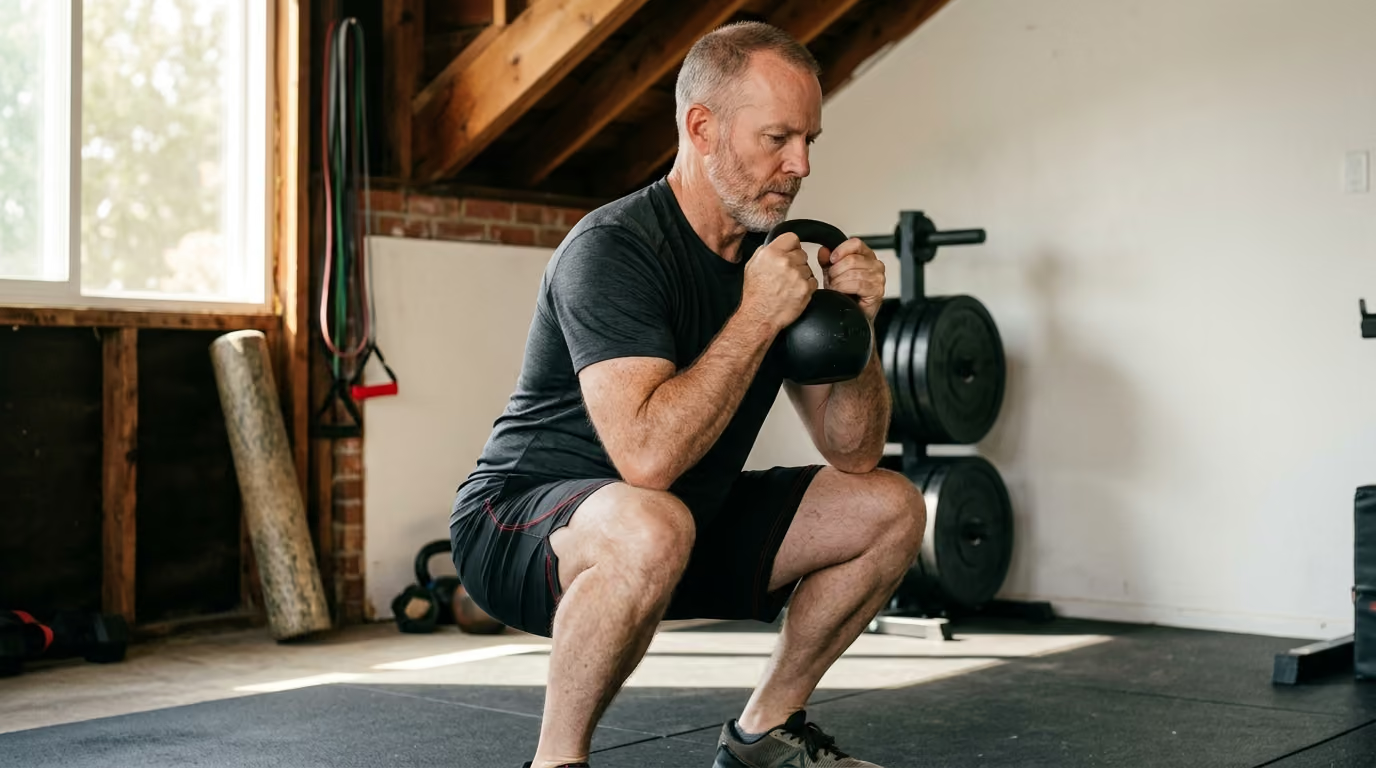
Paused goblet squats
Hold a dumbbell or kettlebell at your chest. Descend smoothly over 3 seconds to your lowest comfortable depth.
Hold the bottom position for 2 full seconds without bouncing or losing tension in your core. Drive forcefully through your feet to return to the top.
Perform 3 to 4 sets of 6 to 8 repetitions. The pause builds strength and confidence at the exact point where you normally feel weak or restricted.
Split squats with front-foot elevation
Place your front foot on a 2-to-4-inch raised platform or plate, and step your back foot behind you in a split stance.
Lower your back knee toward the floor while driving your front knee forward over your toes. Allow your front hamstring to cover your calf if your joint tolerance permits, keeping your front heel flat.
Press back up through the front leg. Perform 3 sets of 8 to 10 repetitions per leg.
This exercise builds single-leg strength, improves hip extension on the trailing leg, and loads ankle dorsiflexion under control.
For more guidance on building strength and muscle mass safely, review our strength and muscle training principles.
A progressive squat restoration ladder
Do not jump straight into heavy barbell back squats if your movement is currently restricted. Follow this step-by-step progression ladder over several weeks. Only advance to the next step when you can perform the current movement with complete control, full heel contact, and zero joint pain.
Level 1: Assisted box squat
- How to perform: Hold onto a suspension trainer or sturdy frame. Squat down to a 16-to-18-inch box or chair. Use your hands for light assistance as needed.
- Goal: 3 sets of 12 smooth repetitions with perfect foot contact and no pain.
Level 2: Bodyweight box squat
- How to perform: Squat to the box without holding onto any support. Reach your arms forward to act as a natural counterbalance.
- Goal: 3 sets of 10 repetitions with a controlled 3-second lowering phase.
Level 3: Counterbalanced goblet box squat
- How to perform: Hold a 10-to-20-pound weight in front of your chest. Squat to the box, pause lightly for 1 second, and stand up without rocking.
- Goal: 3 sets of 10 repetitions with crisp technique.
Level 4: Heel-elevated goblet squat (free-standing)
- How to perform: Place your heels on small 5-pound plates or a squat wedge. Remove the box and perform free-standing goblet squats to your natural depth.
- Goal: 3 sets of 8 to 10 repetitions reaching parallel depth comfortably.
Level 5: Flat-ground goblet squat
- How to perform: Remove the heel elevation. Squat on flat ground holding a kettlebell or dumbbell at chest height.
- Goal: 3 sets of 8 to 10 repetitions with flat feet and a tall chest.
Level 6: Loaded barbell front or back squat
- How to perform: Transition to a barbell front squat, safety bar squat, or back squat. Add weight gradually while keeping the full depth you established in earlier levels.
- Goal: Consistent progressive overload across your regular training schedule.
Progressing through this ladder ensures your joints, tendons, and muscles adapt together without triggering setbacks.
For comprehensive recovery routines, check our mobility and recovery resources.
Managing joint pain and stiffness
It is vital to distinguish between normal muscular stiffness and symptoms that require medical assessment. Mild tightness that warms up after a few minutes is normal. Sharp joint pain is a sign to modify your approach.
If you experience joint swelling, a feeling of the knee or hip catching or locking, sudden instability, or pain that keeps you awake at night, stop self-treating. Get an evaluation from a physical therapist or sports medicine physician.
Working with osteoarthritis
Osteoarthritis in the knees or hips is common after 45. Having arthritis does not mean you must stop squatting.
Clinical research demonstrates that appropriately designed resistance training does not worsen osteoarthritis symptoms when the load and volume are matched to current tolerance. Clinical guidelines for hip and knee osteoarthritis consistently recommend exercise therapy to reduce pain, improve physical function, and maintain mobility.
In clinical programs, exercise interventions typically run 1 to 5 times per week over 5 to 16 weeks, using tailored movement doses. For example, clinical guidance often uses mini-squats supported by a chair to a 45-degree angle as a safe starting point for people with sensitive hips.
If you have joint changes, apply these practical rules:
- Keep discomfort mild. On a scale of 0 to 10, keep any joint sensation at a 3 or below.
- Ensure symptoms settle within 24 hours. If your joints ache the next morning or show swelling, you exceeded your current tolerance.
- Reduce depth temporarily. Squatting to a higher box lets you build strength without irritating sensitive joint angles.
- Control the tempo. Avoid bouncing out of the bottom position. Use a smooth 3-second descent and a brief pause.
Consistency and sensible progression protect joint cartilage far better than complete rest.
Common mistakes in squat advice
Squat guidance is filled with oversimplified rules that lead older lifters astray. Here are five widespread claims that the evidence does not support:
Claim 1: "Everyone must squat below parallel."
Parallel or below-parallel squatting is an athletic standard for powerlifters, but it is not a mandatory requirement for health, mobility, or strength. Your anatomical hip structure, limb lengths, and personal goals determine your ideal depth. A controlled squat to parallel or just above parallel provides excellent muscular and functional benefits without forcing joints into painful impingements.
Claim 2: "Tight calves are the only reason your heels rise."
While ankle dorsiflexion is important, a rising heel can also result from poor balance, weak quadriceps, an overly narrow stance, or an apprehension about falling backward. Treating the ankle in isolation while ignoring stance width and trunk mechanics will leave your squat stuck.
Claim 3: "Your knees must never travel past your toes."
This old fitness myth has been thoroughly disproven. For the knees and hips to flex properly during a squat, the knees must move forward over the feet. Artificially forcing the shins to stay vertical places massive shear stress on the lower back and prevents you from reaching a stable bottom position.
Claim 4: "A forward torso lean is always bad technique."
Your torso angle is dictated by your limb proportions and your squat style. A lifter with long femurs and a short torso must lean forward more than a lifter with short femurs to keep their center of mass balanced over their feet. As long as your spine remains neutral and stable, a moderate forward lean is a completely valid mechanical strategy.
Claim 5: "Heel wedges permanently fix your ankle mobility."
Placing wedges or weight plates under your heels is a fantastic tool to make squatting immediately accessible. However, it changes the geometry of the squat; it does not increase actual ankle dorsiflexion. Use heel wedges as a practical stepping stone while you work on your ankle mobility, not as a permanent excuse to ignore joint restrictions.
Where the evidence is thin
While biomechanical research on squatting is extensive, specific areas of evidence remain limited:
- Age-specific mobility prescriptions: Most biomechanical squat studies look either at young, trained athletes or at frail older clinical populations. High-quality clinical trials comparing specific mobility protocols exclusively in active men aged 45 to 65 are sparse.
- Passive stretching for joint structure: Research shows that stretching increases tolerance to stretch sensation, but evidence is thin that passive stretching permanently alters deep joint capsule morphology or bony constraints.
- Commercial mobility tools: Foam rollers, massage guns, and flossing bands provide short-term changes in perceived stiffness and pain perception. High-quality evidence that these tools create lasting structural improvements in squat depth is lacking.
- Universal stance guidelines: Studies clearly show vast individual variations in pelvic and femoral anatomy. Research does not support any single foot width or toe angle as universally ideal for all individuals.
Because the evidence highlights wide individual variation, self-testing and progressive personal adjustments remain the most reliable path forward.
The takeaway on squat mobility
Improving your squat depth after 45 is not about forcing your body into an arbitrary shape; it is about systematically expanding your usable ankle and hip range while building strength and control in the positions you want to own.
When you match your stance to your anatomy, address your specific movement limiters, and progress through loaded variations patiently, you can maintain deep, capable, and pain-free movement for decades to come.
When to revisit this resource
Revisit this guide if your squat depth stalls, if you experience a flare of joint stiffness after increasing your training volume, or when you are ready to advance from supported box squats to free-standing loaded variations.
Consistent, thoughtful practice will always outperform aggressive stretching.
Sources
- World Health Organization 2020 guidelines on physical ... - PMC
- 2020 WHO guidelines on physical activity and sedentary behavior - PMC
- World Health Organization 2020 guidelines on physical ...
- RECOMMENDATIONS - WHO Guidelines on Physical Activity ...
- Chronic effects of stretching on range of motion with ... - PMC
Stay sharp
Get the word
Join our newsletter for the best writing advice and stories from the field.